Narrate your Zoomable Image on StoryMapJS
Learn how to narrate your zoomable image on StoryMapJS platform.
StoryMapJS allows you to create interactive maps that combine text, images, videos, and other media. See above example. This comes in handy when exploring historical events, documenting geographical shifts, or sharing personal experiences.
We'll use an image from our homepage as an example. If you haven't created one, give it a try! It's free and your users will appreciate the details. If you would like to create one on your computer, try our offline version or the Photoshop plugin, which is our best seller product.
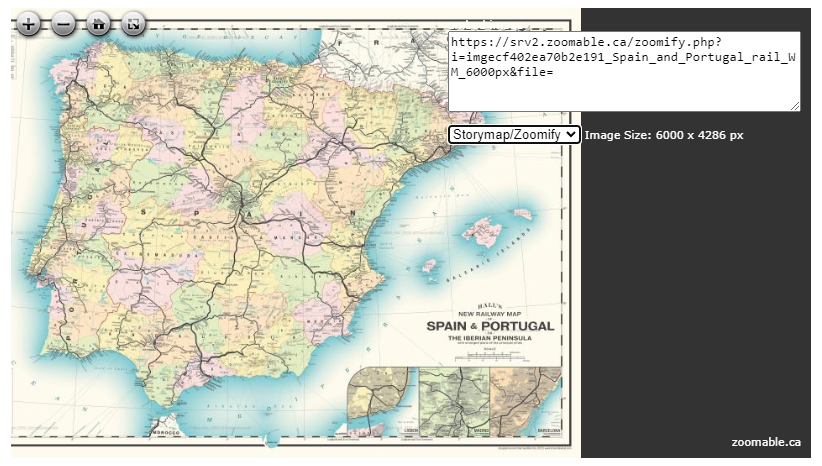
Step 1: Copy the address from the embed image box (top right corner of the viewer). Make sure Storymap/Zoomify is selected from the drop down menu. Take note of the Image Size, as it will be used later.
Step 2: In StoryMapJS, use your zoomable image by providing the following options:
Treat As: Image
Map Type: Gigapixel
Zoomify URL: the URL you copied from Step 1
Max Image Size: Width, Height (Image Size from Step 1)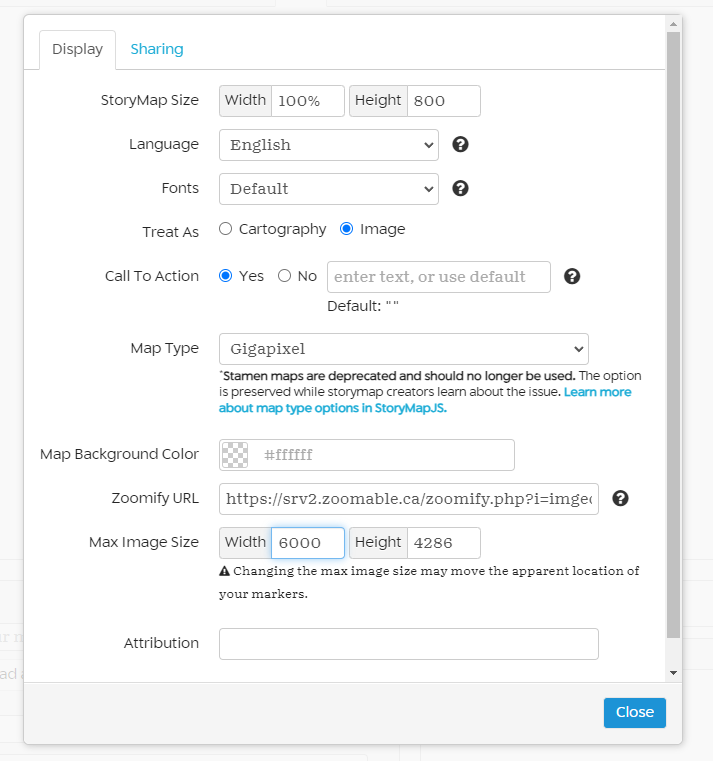
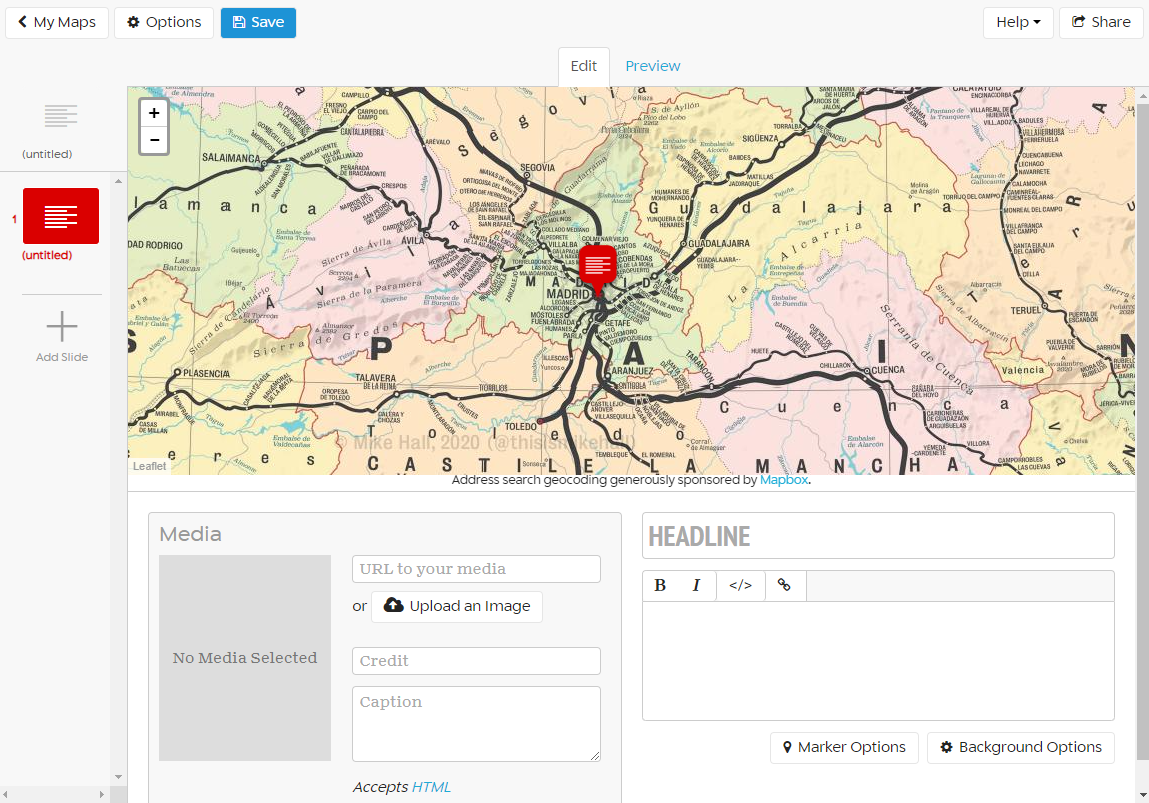
Step 3: To test your image, click Add Slide on the left. Zoom and pan your image accordingly, move the red pin to the desire spot.
Once all the options are set, click Close to continue. An overview image is shown.
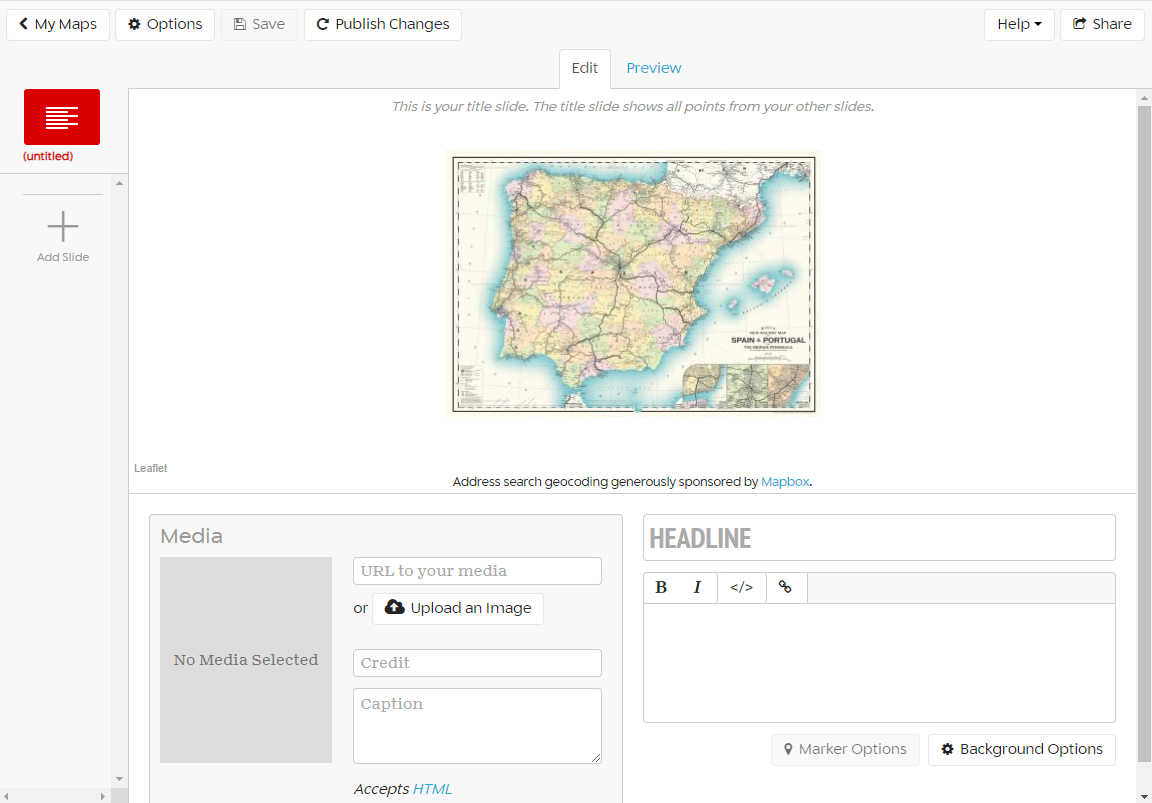
Voila! Now you can start storytelling with your Zoomable image on StoryMapJS. Easy right? If you have any questions, leave us a message and we'll help you out.