Create zoomable image from Photoshop
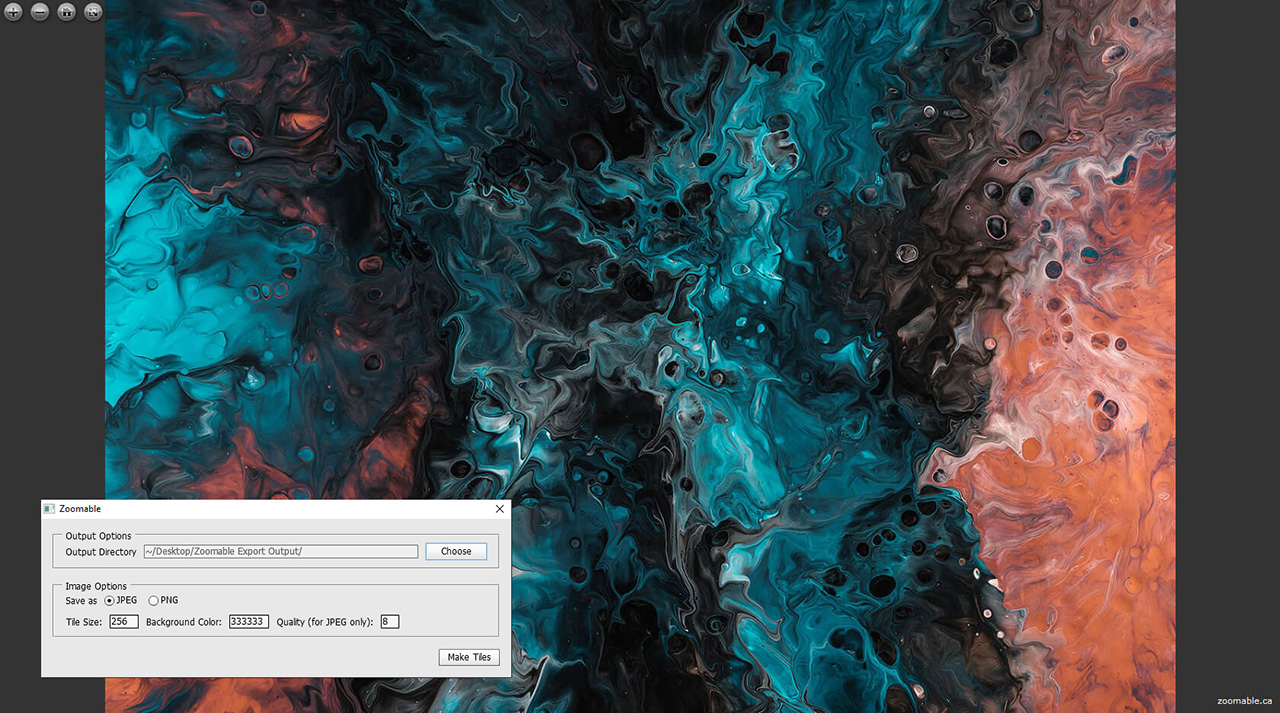
Photo by Paweł Czerwiński on Unsplash
August 2023: As shown at the top of this page, the following options are added to customize the output of the zoomable image:
- Save as JPG (photographs) or PNG (transparent OR vector images)
- Tile Size (e.g. 256, 512, 768 1024), comes in handy if you have a very large image (more than 10,000 pixels wide) and want to improve the loading time when using the zoomable viewer
- Background color (of the zoomable viewer)
- Quality (for JPG only)
To use the new features, make sure you download the JSX file labelled ZoomableExportWithOptions. See instructions below for details.
If you purchased our plugin on Adobe Exchange, it will be available in due course.
January 2021: This product is also available on Adobe Exchange.
December 2020 Update: The Zoomify Export tool was removed in December 2020 release of Photoshop (version 22.1). A replacement script is available in case downgrading is not possible in the future. Make sure you download the JSX file instead of the ZIP file. See instructions below for details.
Instructions (Photoshop version 22.1 onwards)
- After purchasing our template, download the JSX file, ZoomableExport (converts image immediately) OR ZoomableExportWithOptions (as shown at the top of this page)
- Copy the JSX file to the following folder:
for Windows:
C:\Program Files\Adobe\Adobe Photoshop...\Presets\Scripts
for macOS:
Applications/Adobe Photoshop…/Presets/Scripts
- Open Photoshop and open an image of your choice.
- Make sure the Color Mode is set as RGB, 8 Bit Color. This prevents the script from crashing Photoshop.
- Click File > Scripts > ZoomableExport OR ZoomableExportWithOptions
- If ZoomableExportWithOptions is chosen, customize the options accordingly. Click "Make Tiles" to continue.
- If you see the spinning wheel, the export has started. Wait for a moment.
- The result is shown in the browser.
Instructions (Photoshop version 22.0 or lower)
- After purchasing our template, download and open the ZIP file.
- Copy the Zoomable folder to the following folder:
for Windows:
C:\Program Files\Adobe\Adobe Photoshop...\Presets\Zoomify
for macOS:
Applications/Adobe Photoshop…/Presets/Zoomify
- Open Photoshop and open an image of your choice.
- Click File > Export > Zoomify...
- As shown in the following screenshot, select Zoomify Zoomable as the Template.
Screenshot
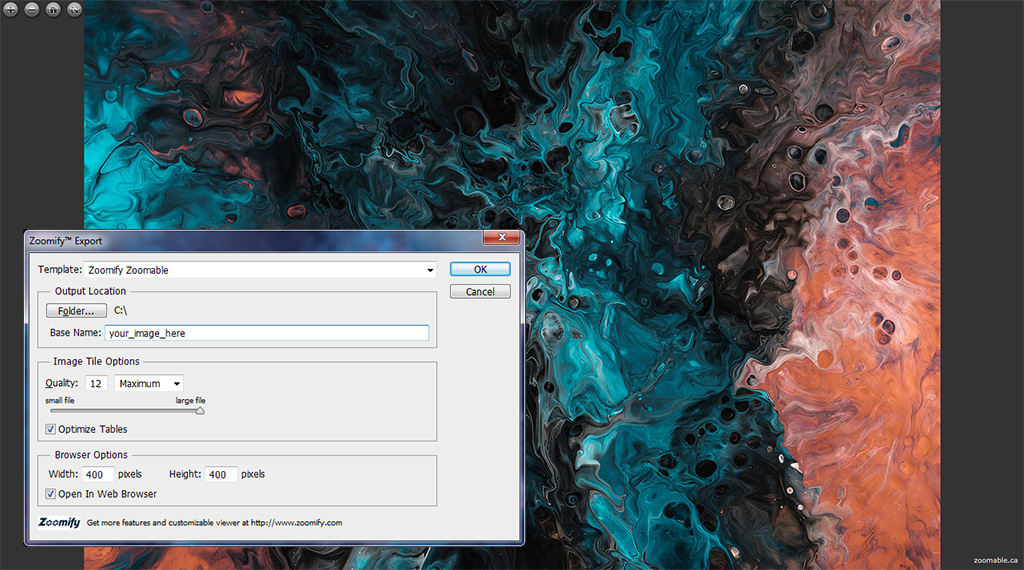
- Click OK to begin the export.
- The result is shown in the browser.
Ready to bring your zoomable images online?
Learn more in how to bring your zoomable images online.
Do you have a lot of images to process?
Consider using Zoomable Batch.
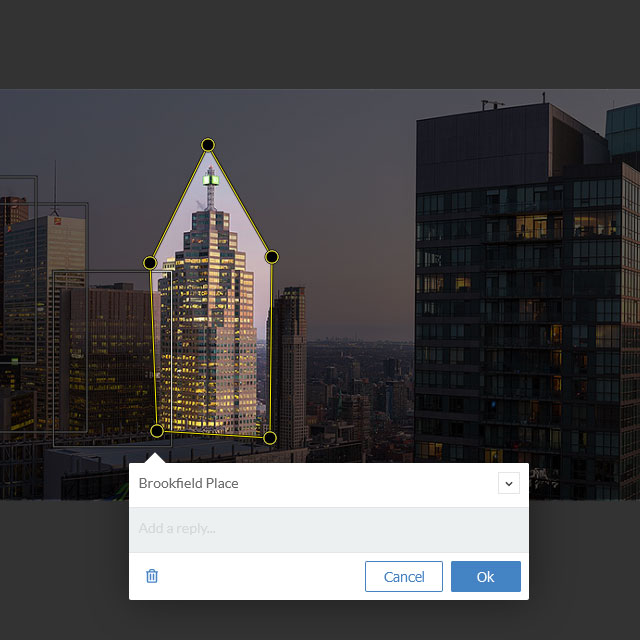
Do you need to annotate your image?
Check out our Annotations Editor.
Frequently Asked Questions
- What does Zoomable for Photoshop template do?
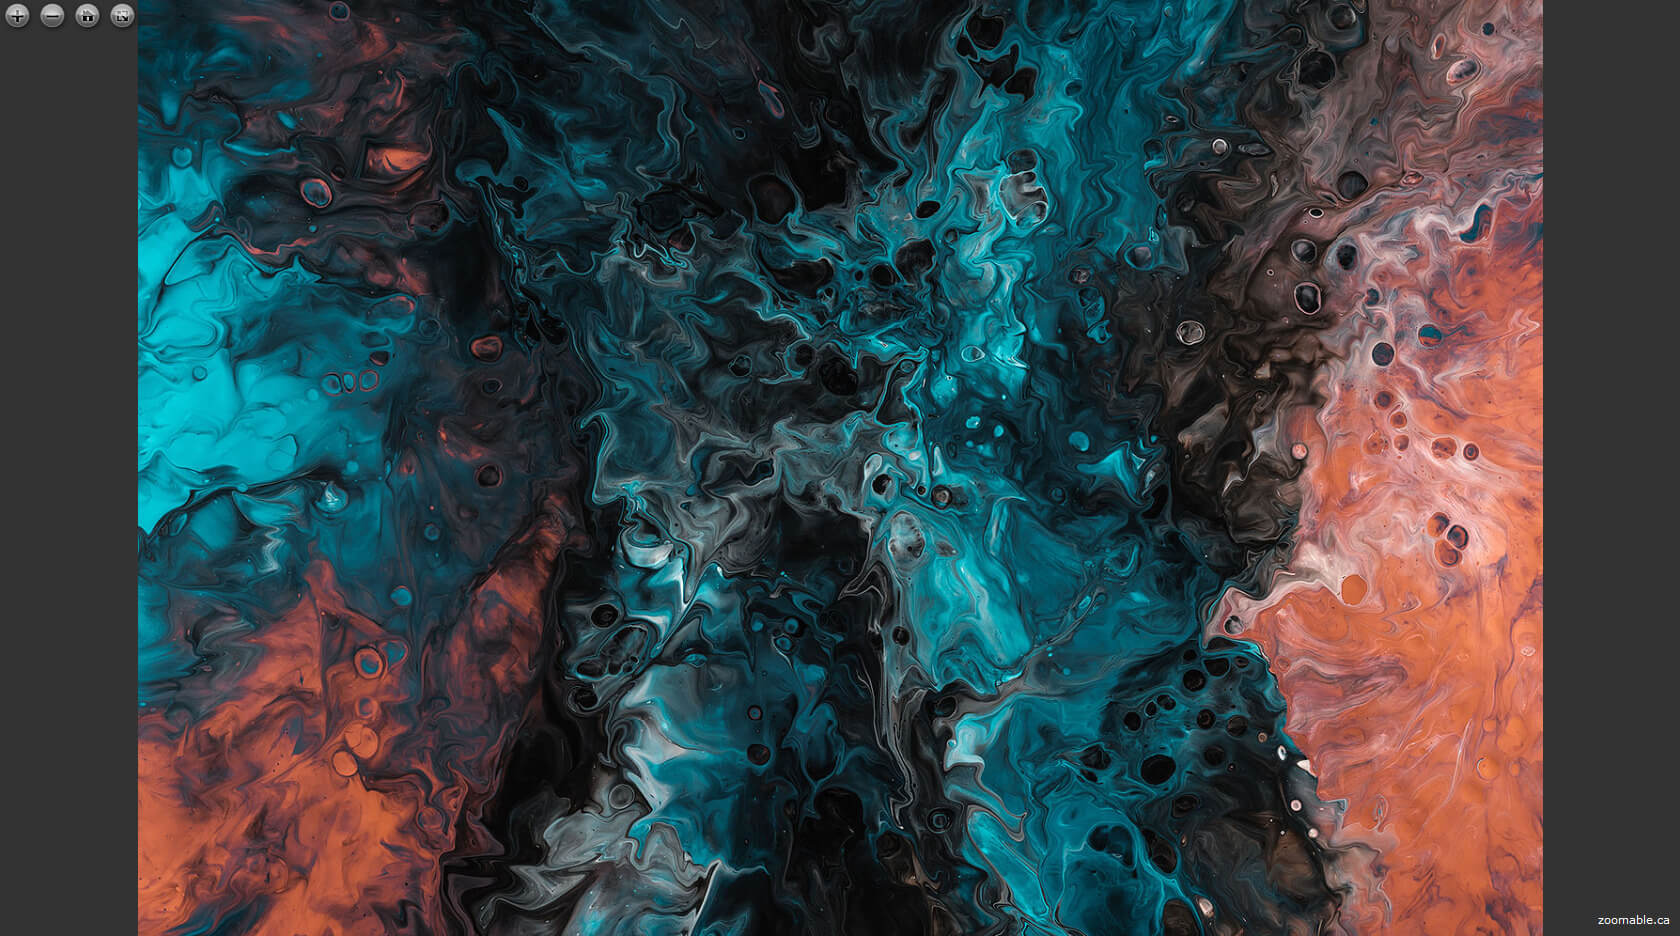
Zoomify for Photoshop creates the zoomable images, and our template creates the viewer for the images. See screenshots below for comparison.
The default installation of Zoomify for Photoshop comes with a proprietary viewer in either Flash or HTML format (Photoshop CC 2015.1 and later), depending which version of Photoshop you are using. The current Zoomify viewer doesn't work locally (meaning the images don't show up until you upload them to a website). Our template uses OpenSeadragon which is a modern, JavaScript based viewer which works on desktop and online. If you are a developer, the viewer is customisable as the viewer is open-source.Without our template: With our template: 
Note to Zoomify Flash users: Adobe will end support of Flash Player on December 31, 2020. If you are still using the Flash viewer, it will stop working after that date. Consider using this template as an alternative.
- Can I customize the viewer?
Yes, as our template is using OpenSeadragon which is a web-based open source viewer. If you are a developer, please refer to the documentation on their website for details. - When should I use PNG instead of JPG in
ZoomableExportWithOptions?
There are two scenarios where it is best to use PNG instead:- Transparent image: saving it to JPG creates unexpected behaviour such as the background in the transparent area is different from the main image.
- Vector graphics: such as diagrams, or graphics imported from Illustrator and saving it to JPG makes the image blurry.
- When should I change the Tile size in
ZoomableExportWithOptions?
if you notice the viewer is taking a long time to load the images when zooming or panning, try bumping it up 512 to see if the loading time improves. Based on our experience, it's very rare that you need to change the value to 768 or 1024, unless you have an extremely large image.