Zoomable for Wordpress
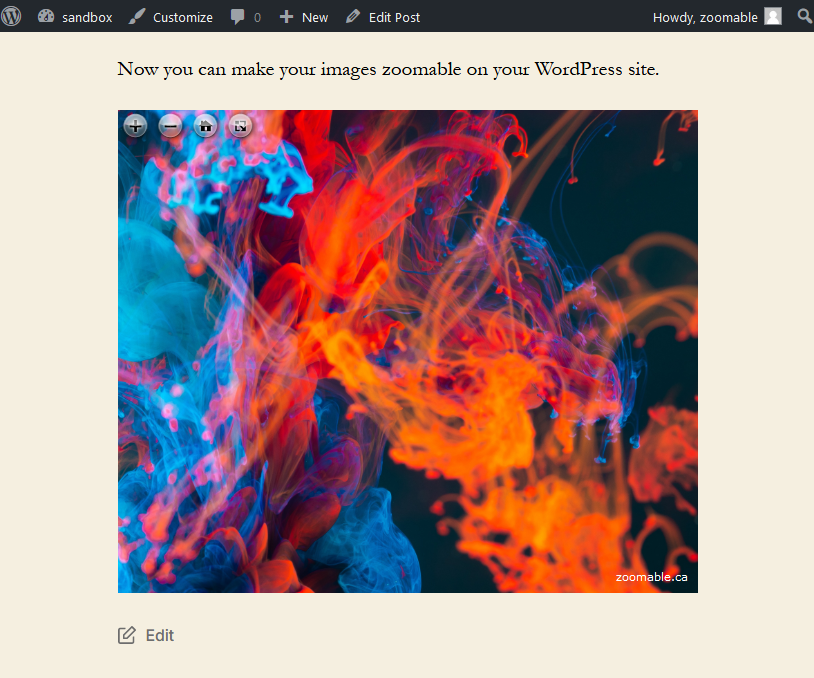
Display your large photos with interactive zooming and panning easily on WordPress.
December 2021: Added macOS support to the Desktop Tool. See Video below for details.
Tip: You could upload your image to our site and embed it to your wordpress site. Check out our guide for details.
Upload your image, add a shortcode and you are done!
With our WordPress plugin, you can make your images zoomable by using the following shortcode:
Single page viewer:
[zoomable id=46]
Multipage viewer:
[zoomable id=46,48,50]
You can also adjust the width and the height of the viewer:
[zoomable id=46 width=336 height=280]
The id is the attachment id which is shown when you open the file in the media tab.

Screenshot courtesy of Gigapress.
Large images support
See it in action on our demo Wordpress site!
Large images can take a while to load on the browser. To improve the loading time, they need to be converted into tiles (think Google Maps but for your images). Included with the plugin, we have a desktop tool (Windows and macOS) that creates the tiles, and have them in one zip file for easy upload back to your Wordpress site. Our plugin will take care the rest.
Supported image format: JPG, TIF, ZIF (Zoomify Image Format)
Instructions (Zip File Creator for Windows)
- After purchasing our plugin, download and open the zip file.
- Copy the
zoomablefolder to the desktop. - Place your images into the
inputfolder. - Double click
create_filesto create the tiles*. - Once completed, the zip files are in the
outputfolder. - Upload the zip files to your WordPress site.
*For larger images (> 10,000 pixels), we recommend you to download our revised script, create_files_custom, where you could adjust the tile size to a higher value (from default value of 256 to 512, but can be changed to 1024 or higher), that way it improves loading time when displaying images on the viewer.
Screenshot: create_files_custom - tile size setting

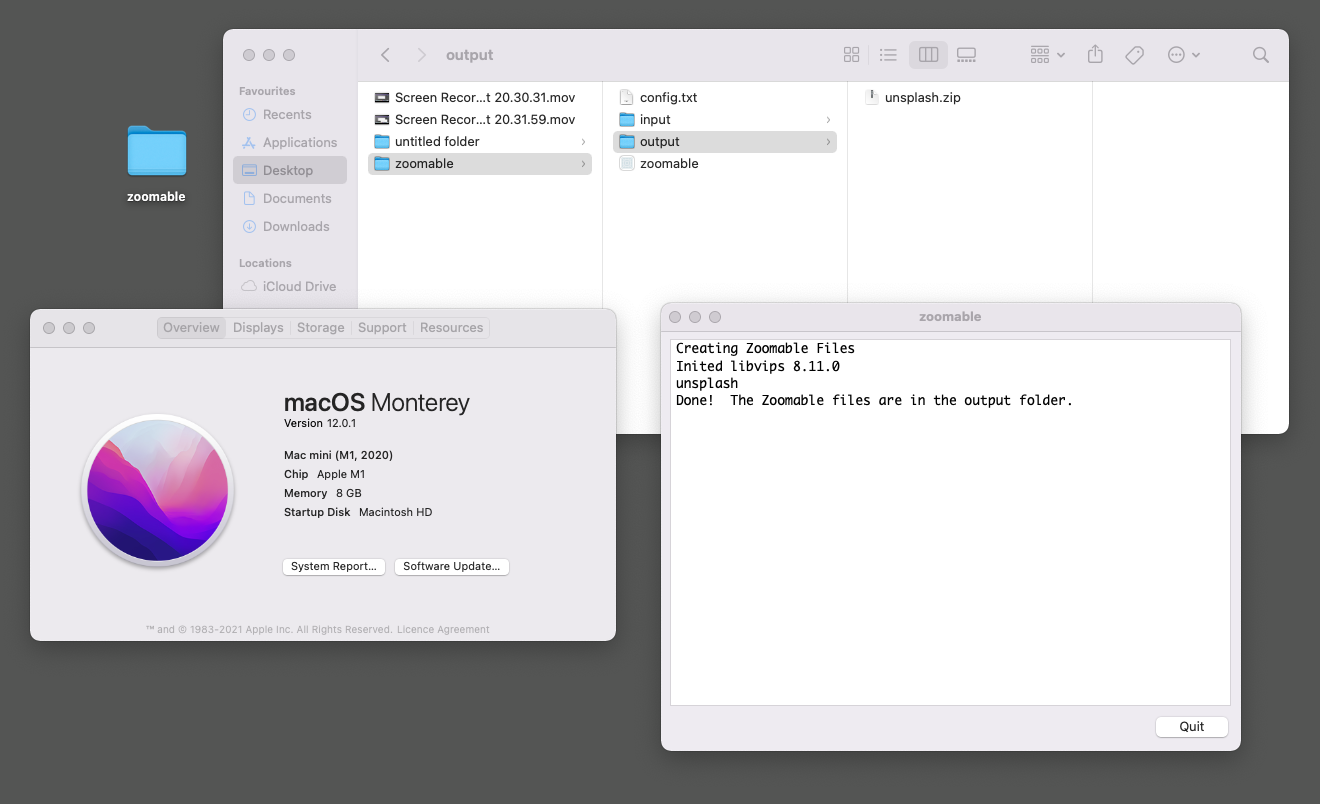
Works on macOS too!
Instructions (Zip File Creator for macOS)
- After purchasing our plugin, download and open the dmg file.
- Copy the
zoomablefolder to the desktop. - Place your images into the
inputfolder. - Double click
zoomableto create the tiles*.
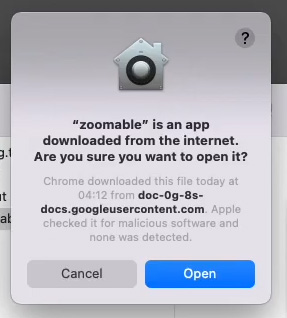
Note: When opening thezoomableprogram for the first time, you might get a prompt that says "This is an application downloaded from the Internet. Are you sure you want to open it?" (see screenshot below). If so, click "Open" to continue.Screenshot
- Once completed, the zip files are in the
outputfolder. - Upload the zip files to your WordPress site.
*For larger images (> 10,000 pixels), we recommend you to add the following line in config.txt:
--tileSize 512
This changes the tile size to a higher value (from default value of 256 to 512, but can be changed to 1024 or higher), that way it improves loading time when displaying images on the viewer.
Screenshot: config.txt - tile size setting

Requirements
- A WordPress site that allows you to install a custom plugin. If you are using WordPress.com, make sure you are using Business or eCommerce plan.
- Make sure PHP Zip Extension is installed on the hosting servers. Many web hosting providers such as WordPress.com and HostGator have it installed already.
You can install a WordPress plugin called PHP Info to see if the extension is installed on your site. Once installed, click on PHP Info (WP) link in the admin menu, and find an entry that says zip, as shown in the screenshot. If you see it, that means you have the extension.

Frequently Asked Questions
- Does the desktop tool (Zip File Creator) work on macOS?
Yes, from the latest version (Monterey) all the way back to High Sierra (version 10.13.6). It also works with Intel processors and Apple silicon (M1). The desktop tool has been signed and notarized. To see it in action, check out our demo video above or the screenshot below.
Screenshot